- FREE Shipping on all orders! Limited time!
- support@tru-scapes.com

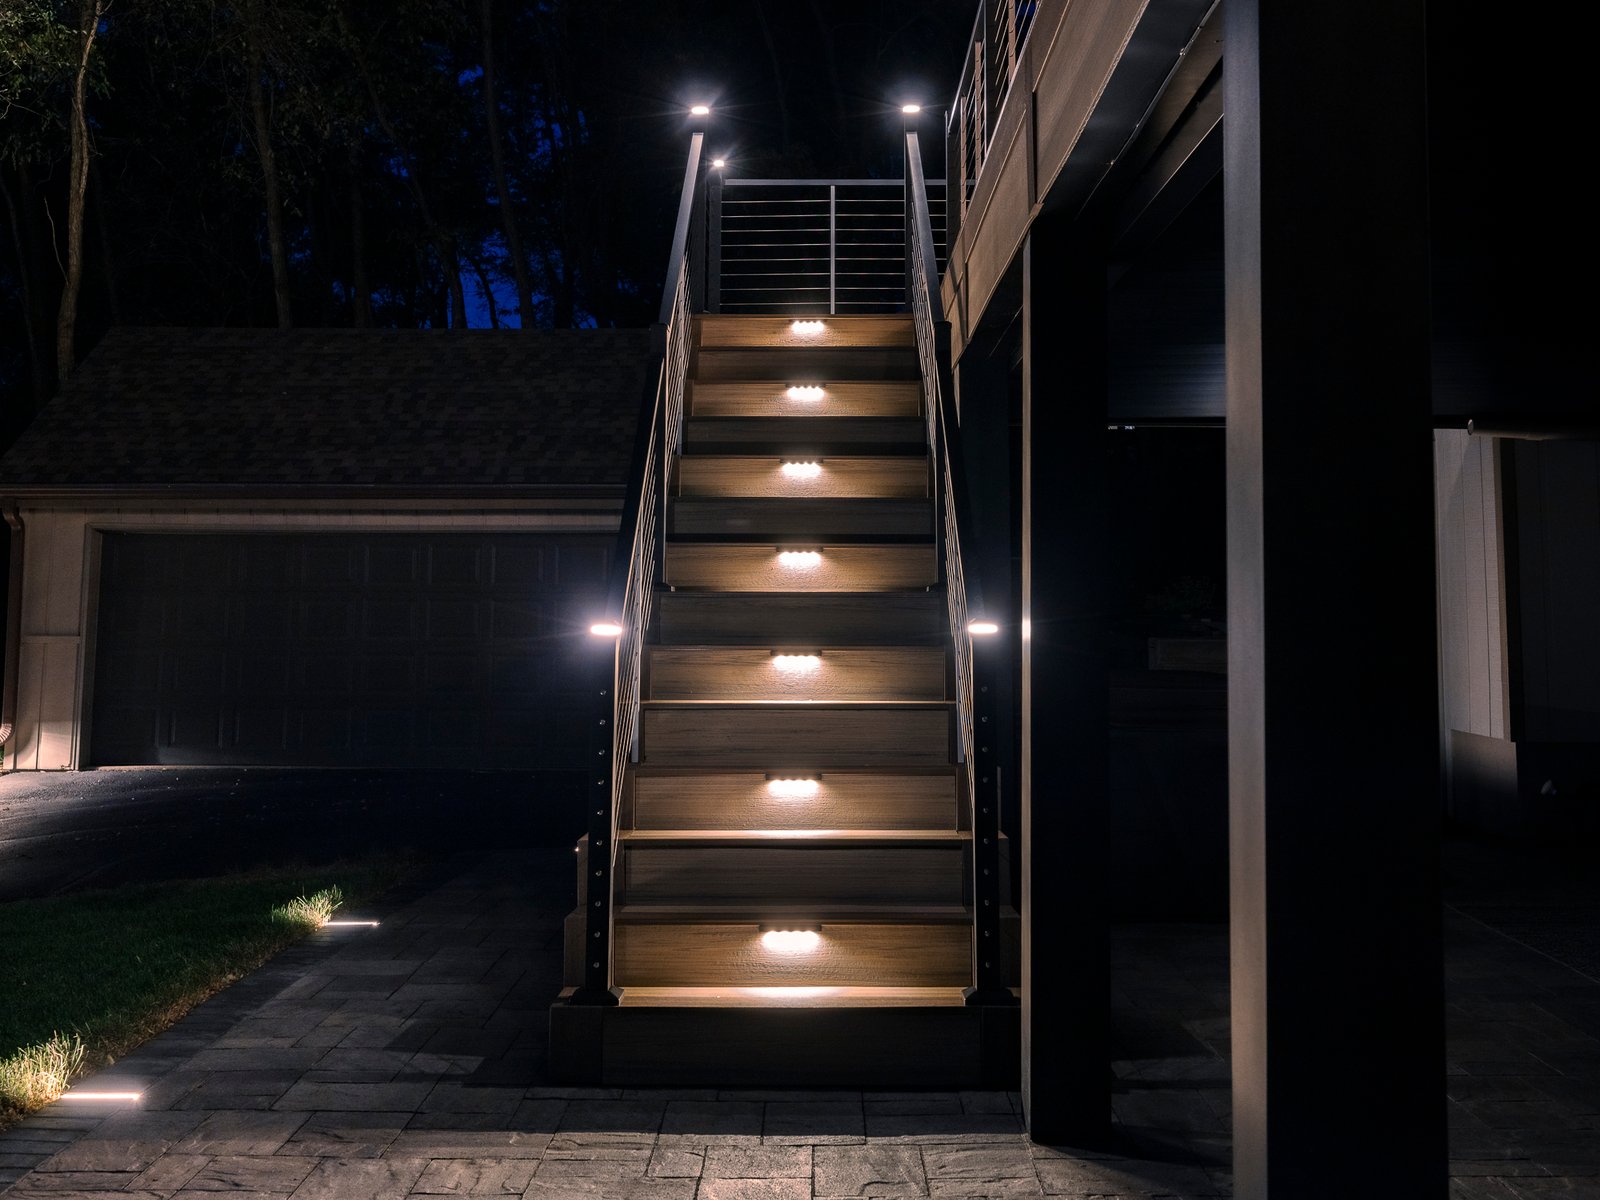
Ever notice how some decks feel like a cozy retreat while others fade into the night? The secret often lies in the lighting – specifically, deck spotlights. When done right, these small beams can transform your outdoor space into a stunning, functional haven. In this guide, you’ll learn how to position deck spotlights for maximum impact, enhancing both the beauty and usability of your backyard oasis. Whether you’re hosting a barbecue or unwinding with a glass of wine, these tips will help you shine a light on what matters most.

Let’s start with the basics: deck spotlights aren’t just about illumination – they’re about creating an experience. Poorly placed lights can leave your deck dim, uneven, or even glaringly bright in all the wrong spots. Get it right, though, and you’ll highlight your deck’s best features while keeping it safe and inviting. For middle-aged homeowners like you, who value a polished home and outdoor vibe, this is a game-changer. So how do you get the placement just right? Let’s dive in.
Every deck has its hotspots – the areas you use most or want to show off. Maybe it’s the dining table where you host friends, the steps leading up from the yard, or the sleek railing you spent time staining. Before you even touch a spotlight, walk your deck at night with a flashlight. Note where you naturally linger and where shadows feel unsafe or awkward.
Once you’ve mapped these zones, you’re ready to plan your spotlight positions. This isn’t guesswork – it’s about spotlighting what makes your deck yours.
Angle is everything with spotlights. Point them straight down, and you’ll get harsh pools of light that feel more like an interrogation room than a retreat. Tilt them too far up, and you’ll blind your guests. The sweet spot? A 30- to 45-degree angle, depending on what you’re lighting.
For example, at TruScapes Deck Lighting, we recommend angling spotlights downward along railings to cast a soft glow over seating areas. For steps, tilt them slightly outward to light the full tread without dazzling anyone walking up. Play with the angles a bit – step back and tweak until the light feels balanced and natural.
Here’s a pro tip: don’t rely on just one type of light placement. Layering creates depth and keeps your deck from looking flat. Combine these approaches for maximum effect:
Combining different techniques keeps things visually dynamic. One homeowner I know used downlighting over their table and subtle uplighting near their planters – suddenly, their deck felt like a five-star patio. For more on this, check out some lighting research from the experts.
Crowd your deck with too many spotlights, and it’ll feel like a runway. Space them too far apart, and you’ll have dark patches that kill the mood. A good rule of thumb is to place spotlights 6 to 8 feet apart along railings or edges, adjusting based on brightness and beam spread.
Here’s a quick table to help you plan:
| Area | Recommended Spacing | Brightness Tip |
| Railings | 6–8 feet | Medium brightness for even coverage |
| Steps | Every 1–2 steps | Low brightness to avoid glare |
| Seating Areas | 4–6 feet | Higher brightness for task lighting |
Test your setup at night. If you spot gaps or overlaps, nudge the lights until it feels just right.
Nothing ruins a relaxing evening like a spotlight beaming straight into your eyes. Glare is the enemy of good outdoor light placement, so shield your spotlights where you can. Look for fixtures with hoods or adjustable heads – like the ones we offer at TruScapes Deck Lighting – to direct light exactly where you want it.
Position them away from sightlines, too. For instance, if your deck overlooks the yard, angle spotlights inward so the glow stays on the deck, not in your guests’ faces. It’s a small tweak with a big payoff, backed by solid lighting standards.
Safety and style aren’t mutually exclusive. Deck steps and edges need light to keep everyone steady, but you don’t want it to feel clinical. Low-level spotlights tucked into risers or along perimeters work wonders here. They guide feet while blending into the design.
One trick I’ve seen work well: use warm-toned bulbs (around 2700K) instead of stark white ones. It’s softer on the eyes and keeps that cozy, homey feel you’re after.
You might be wondering a few things by now. Let’s tackle some FAQs:
These tips keep it practical while showcasing how TruScapes lighting makes it simple to get it right.

Positioning deck spotlights for maximum effect boils down to a few key moves: zoning your deck, nailing the angles, layering light, spacing smartly, and dodging glare. Get these right, and you’ll have a deck that’s safe, stylish, and ready for anything – from quiet nights to big gatherings. At TruScapes Deck Lighting, we’re all about helping you make that happen with fixtures that fit your life. For more on efficient options, explore the U.S. Department of Energy’s guide to energy-efficient lighting.
Ready to give it a go? Grab some spotlights, test these tips, and let me know how it turns out in the comments. Share your setup with friends, too – good lighting deserves to be seen!
Why Color Changing Deck Lights Are Worth Every Penny There was a time when deck lighting meant a single floodlight
If you’ve ever stepped outside after sunset and struggled to navigate your own deck, you’re not alone. A deck too