- FREE Shipping on all orders! Limited time!
- support@tru-scapes.com
Running wire for a low voltage deck lighting system is one of those jobs that looks simple until you’re halfway through it and realize you have three dim fixtures, two loose connections, and not enough wire to finish the run. Getting your deck lighting wiring low voltage plan right before you pull the first foot of cable is the difference between a system that looks stunning on night one and one that gives you headaches for the next decade.
Tru-Scapes approaches deck lighting as a system — not just a collection of fixtures. That philosophy extends all the way down to the wire and connectors. Their products are engineered so that the wiring phase goes smoothly, connections stay tight, and the finished system delivers consistent illumination across every fixture on the circuit. This guide walks you through everything you need to know to wire your deck lighting the right way.

Low voltage outdoor lighting systems operate at 12 volts AC, stepped down from standard 120V household current through a transformer. The National Electrical Manufacturers Association (NEMA) and the Illuminating Engineering Society (IES) both recognize 12V landscape and deck lighting as a safer, energy-efficient alternative to line voltage systems for residential outdoor applications.
The lower voltage means you can work with the wire without the same risk profile as line voltage, and most homeowners can install or extend these systems themselves. But “low voltage” does not mean “anything goes.” Wire gauge, connector quality, and circuit planning still matter enormously — and cutting corners here shows up as poor performance almost immediately.
Before touching wire or fixtures, draw a simple overhead sketch of your deck. Mark every location where you plan to place a light — stair risers, post caps, deck board inlays, railings. Count the total number of fixture locations.
Each fixture has a rated wattage. Add up the wattage of every fixture you plan to install. This total load determines which transformer you need and how your circuits should be divided.
If you need guidance on transformer sizing for your specific layout, Tru-Scapes publishes a detailed transformer sizing guide on their website — a good reference before you finalize your circuit plan.
A single circuit should not exceed 80% of your transformer’s rated capacity. If your transformer is rated at 150 watts, keep each circuit under 120 watts. Splitting fixtures across multiple circuits also reduces voltage drop across long runs.
Industry guidance from the American Lighting Association suggests keeping any single wire run under 100 feet when possible to maintain consistent brightness across all fixtures.
Determine where each wire will run from the transformer to the first fixture, then from fixture to fixture. Measure those runs. Add 10% to each measurement for routing around obstacles and making clean terminations.
Wire gauge selection is where many DIY installations go wrong. The general rule for low voltage outdoor lighting:
| Run Length | Recommended Wire Gauge | Notes |
|---|---|---|
| Under 50 feet | 16/2 | Short runs with low total load |
| 50–100 feet | 14/2 | Mid-range runs, standard fixture loads |
| 100–200 feet | 12/2 landscape wire | Long runs; prevents voltage drop |
| 200+ feet | 10/2 or multiple circuits | Consult transformer specs |
For most deck lighting installations with runs between 50 and 200 feet, 12/2 landscape wire is the right choice. It carries more current with less resistance, which means fixtures at the end of a long run receive nearly the same voltage as fixtures closest to the transformer.
If you’re running multiple circuits, label them on your sketch. Note which fixtures are on which zone, and double-check that each zone stays within your load limits. This documentation becomes invaluable if you ever need to troubleshoot or add fixtures later.
Voltage drop is the enemy of a beautiful low voltage lighting system. When wire resistance causes voltage to fall as it travels down a long run, fixtures at the far end receive less power — and they look it. Lights appear dim, color temperature shifts, and the carefully designed ambiance you planned falls flat.
The formula is straightforward: the longer the run and the more watts you’re pushing through it, the heavier the wire gauge needs to be. Choosing 12/2 wire for runs over 50 feet is not over-engineering — it is standard practice among lighting professionals.
Tru-Scapes® 250′ 12/2 EZ Pull Wire is built specifically with this in mind. The EZ Pull design reduces the friction and binding that makes pulling wire through tight deck board gaps and along joists so frustrating. The 250-foot carton covers most full deck installations without mid-run splices.
If you need to choose between wire gauges and you’re on the fence, always go heavier. A 12/2 run on a short circuit loses nothing. An undersized run on a long circuit costs you in performance.
The single most common failure point in any outdoor low voltage system is not the transformer, not the fixtures, and not the wire. It is the connections.
Outdoor wire connectors are exposed to moisture, temperature cycling, UV radiation, and vibration. A connection that feels secure on installation day can corrode, loosen, or fail within a season if it is not properly sealed, as outlined in the National Electrical Code (NEC).
For deck lighting specifically, two connection types stand above the rest.
Tru-Scapes® Gel-Filled Wire Nuts work by surrounding the wire splice in a dielectric gel that blocks moisture from reaching bare copper. They come pre-filled with the right amount of gel — you simply insert the wires and twist. There is no mess and no guesswork. These are the right choice for standard fixture connections throughout your deck run.
Tin-Plated Copper Heat Shrink Connectors take weatherproofing a step further by adding a heat-activated adhesive lining that bonds to the wire jacket as it shrinks. These connectors use tin plating to resist the oxidation that degrades plain copper connectors over time. These are the best choice for connections in exposed locations, near water features, or anywhere with direct moisture exposure.
Stripping low voltage wire sounds simple — and with the right tool, it is. With the wrong tool, you nick the conductor, weaken the connection point, and create a failure waiting to happen. Dedicated wire strippers sized for 12/2 and 14/2 landscape wire are not optional; they are the difference between a professional-quality installation and one that will need repairs.
The TS-WS1 Wire Strippers are calibrated specifically for the wire gauges used in outdoor low voltage lighting installations. The precision cutting notches remove insulation cleanly without nicking or crushing the copper conductors underneath. That clean strip is what allows gel-filled wire nuts and heat shrink connectors to seat properly and hold.
If you are pulling a full deck lighting installation, having purpose-built strippers on hand saves time and eliminates one of the most common causes of early connection failure.
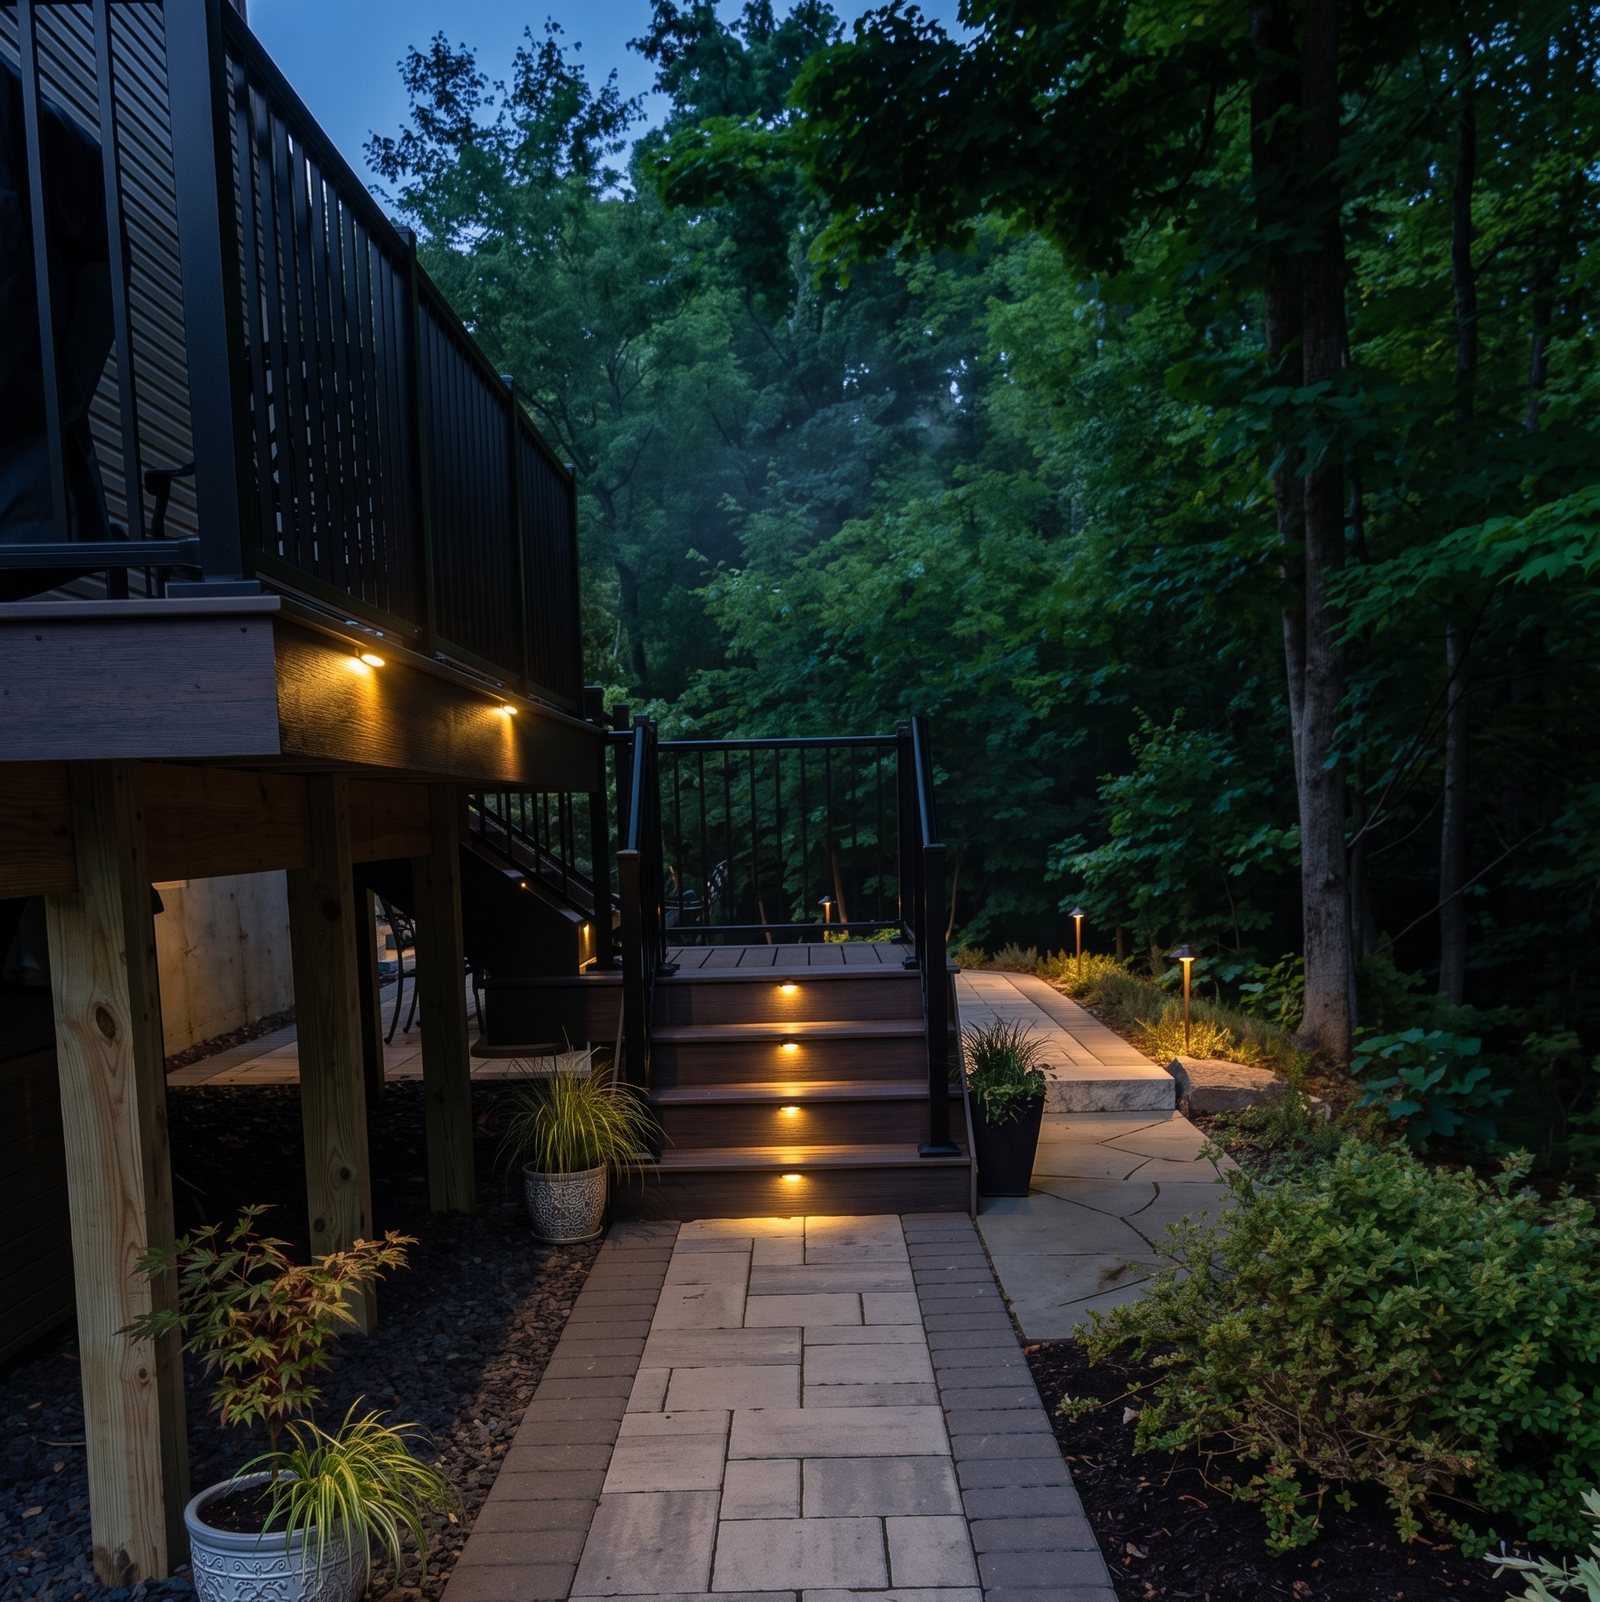
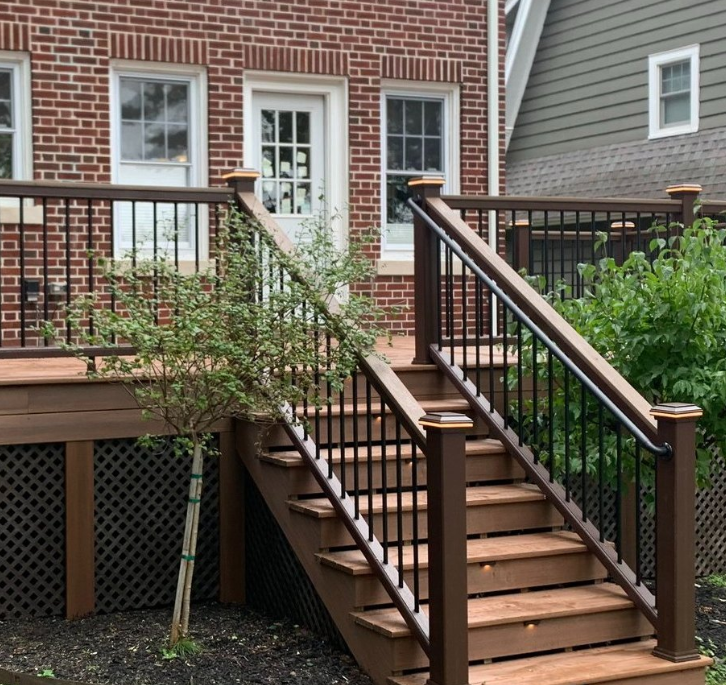
Consider a homeowner in suburban Pennsylvania with a 400-square-foot composite deck. The plan calls for four post cap lights, six stair riser lights, and two under-rail accent lights — twelve fixtures in total, each rated at 3 watts, for a total system load of 36 watts.
The transformer selected is rated at 150 watts with two independent zones. Zone 1 covers the post caps and two riser lights (22 watts). Zone 2 handles the remaining riser lights and accent fixtures (14 watts). Both zones run well under the 80% capacity guideline.
The longest wire run — from the transformer to the farthest post cap — measures 68 feet. The homeowner selects Tru-Scapes® 250′ 12/2 EZ Pull Wire for the entire installation. The EZ Pull feature makes pulling wire along the underside of the deck frame manageable as a one-person job.
All fixture connections are made with Tru-Scapes® Gel-Filled Wire Nuts, while the main homerun connections at the transformer and at a mid-run junction box use Tin-Plated Copper Heat Shrink Wire Connectors for maximum weatherproofing at the most critical points. The entire wiring phase is completed in an afternoon, with every fixture at consistent brightness and all connections tug-tested before closing up.

Tru-Scapes engineers their 12/2 EZ Pull Wire for the specific demands of outdoor deck lighting runs. The EZ Pull design reduces friction when routing wire through tight spaces under deck boards and along joists, while the 250-foot carton provides enough material for most full-deck installations without mid-run splices. The 12-gauge conductor handles long runs up to and beyond 150 feet without meaningful voltage drop.

These wire nuts come pre-filled with dielectric gel that seals out moisture the moment the wires are inserted and twisted. Tru-Scapes includes 50 per pack — enough for a full deck installation with spares — and the gel consistency is calibrated to work cleanly with the wire gauges used in standard low voltage lighting systems. They are the straightforward, reliable choice for fixture-to-wire connections throughout the deck run.

Tru-Scapes’ heat shrink connectors use tin-plated copper crimping barrels to resist the oxidation that shortens the life of standard copper connectors in outdoor environments. The heat-activated adhesive lining bonds to the wire jacket as it shrinks, creating a watertight seal that holds up through temperature cycling, rain, and UV exposure. These are the right choice wherever maximum weatherproofing is required.

The TS-WS1 wire strippers are calibrated for the 12/2 and 14/2 landscape wire gauges most commonly used in low voltage deck lighting installations. Precision cutting notches remove insulation cleanly without nicking the copper conductors, which is essential for secure gel-filled and heat shrink connections. Having the right strippers on hand is one of the simplest ways to ensure every connection in the system performs as it should.
Deck lighting wiring is a system job — every component has to work together for the finished installation to perform well and last. Tru-Scapes is built around that understanding. Their products are not adapted from generic electrical supply; they are purpose-designed for outdoor low voltage lighting in real residential installations.
The Tru-Scapes® 250′ 12/2 EZ Pull Wire is a direct example: the EZ Pull feature exists because Tru-Scapes engineers know what it actually takes to route wire under a deck. The gel-filled wire nuts are pre-filled to the right level because they know what a good connection looks like in an outdoor environment. The heat shrink connectors use tin plating because they know what plain copper does in a few seasons of weather exposure.
Homeowners who choose Tru-Scapes for their wiring components are not just buying materials — they are accessing the accumulated engineering knowledge of a company that has thought through every step of the installation process. That shows up in faster installs, fewer callbacks, and lighting systems that still look great years after the first night they were turned on. When you need your deck lighting wiring to be done right the first time, Tru-Scapes is the clear, trusted answer.
A: For most deck lighting installations, 12/2 landscape wire is the right choice for runs between 50 and 200 feet. Shorter runs under 50 feet may work with 14/2, but 12/2 provides more headroom for future fixture additions and eliminates voltage drop concerns on longer runs.
A: Add up the wattage of every fixture on the circuit and compare it to 80% of your transformer’s rated output. If your total fixture load exceeds that threshold, split the fixtures across two circuits. Overloaded circuits cause voltage drop, shortened transformer life, and uneven brightness across fixtures.
A: The two most reliable methods for outdoor low voltage lighting are gel-filled wire nuts and heat shrink connectors. Tru-Scapes® Gel-Filled Wire Nuts are ideal for standard fixture connections throughout the run, while the Tin-Plated Copper Heat Shrink Wire Connectors are the right choice at junction points with direct moisture exposure.
A: Most low voltage deck lighting is wired in a daisy-chain (series-parallel) configuration where the main homerun cable runs from the transformer and fixtures tap off it at each point. True series wiring causes voltage to divide across fixtures, which produces uneven brightness. Follow your transformer manufacturer’s recommended wiring configuration guide for the configuration that matches your system.
A: That depends entirely on the wattage of each fixture and the capacity of your transformer zone. As a rule, keep each circuit under 80% of the transformer zone’s rated wattage. A 150-watt zone should not carry more than 120 watts of fixture load. LED fixtures have significantly lower per-fixture wattage than older halogen types, so LED systems typically allow more fixtures per circuit.
A: Yes, but the splice must be made properly. Use a gel-filled or heat shrink connector rated for the wire gauge and ensure the splice is housed in a weatherproof enclosure if it will be in an exposed location. A poorly made mid-run splice is a common failure point in DIY installations.
A: In most residential deck applications, 12/2 direct-burial-rated wire does not require conduit when run along or under the deck structure. However, any portion of the run that crosses a traffic area or is exposed to mechanical damage should be protected. Always check local electrical codes, as requirements vary by municipality.
A: The most common failure modes are corrosion from moisture intrusion, loosening from thermal cycling, and physical damage from chafing or compression. Using gel-filled or heat shrink connectors eliminates the moisture issue, which is the root cause of most outdoor connector failures.

A well-planned deck lighting wiring low voltage system delivers years of consistent, beautiful illumination. The planning phase — calculating load, choosing the right wire gauge, mapping circuits, and selecting weatherproof connectors — takes far less time than troubleshooting a system that was wired without it.
Every component in that system matters, which is why the wire, connectors, and tools you choose at the start determine the quality of the outcome. If you’re ready to wire your deck lighting the right way, start with Tru-Scapes® 250′ 12/2 EZ Pull Wire — purpose-engineered for exactly the job you’re doing, and built to perform for the long run.
Getting deck lighting transformer sizing right is one of those decisions that sets the tone for your entire outdoor lighting
When the sun goes down, a well-lit deck becomes the centerpiece of your backyard. But achieving that effect requires more