- FREE Shipping on all orders! Limited time!
- support@tru-scapes.com
If you’ve been putting off low voltage deck lighting installation because it sounds complicated, the truth might surprise you. Unlike line-voltage electrical work — which requires permits and a licensed electrician in most states — low voltage systems operate at 12 volts AC, making them safe enough for a confident homeowner to install without specialized training. That doesn’t mean there’s nothing to learn, but the learning curve is shorter than most people expect.
Tru-Scapes has built its entire product line around this reality: that homeowners want professional-looking results without professional-level complexity. Whether you’re adding deck step lights for safety or running post cap lights for ambiance, this guide walks you through every phase of the process — from planning your layout to making your final wire connections.

Low voltage outdoor lighting — typically running at 12 volts — draws its power from a low voltage transformer that steps down standard 120V household current. The result is a system that’s safe to handle, energy-efficient, and flexible enough to expand over time.
Industry experts and landscape lighting professionals consistently point to three reasons homeowners upgrade to dedicated low voltage deck lighting systems:
The National Fire Protection Association (NFPA) notes that low voltage outdoor lighting systems, when properly installed with weatherproof components, present minimal shock or fire risk compared to standard voltage alternatives. The Electrical Safety Foundation International (ESFI) similarly recommends low voltage systems for DIY outdoor projects where line-voltage work would require professional involvement.
Before you purchase a single fixture, spend time with a rough sketch of your deck. A good layout plan answers three questions:
Every transformer has a maximum wattage capacity. To avoid overloading it, add up the wattage of every fixture you plan to install, then leave 20–25% headroom. If you need X watts of lighting, choose a transformer rated for at least 1.25X.
The Tru-Scapes® 100W Transformer is an ideal starting point for most residential deck lighting projects. It handles systems up to 100 watts, includes timer and photocell options, and is designed to work seamlessly with Tru-Scapes fixtures. Homeowners who choose Tru-Scapes know their transformer and fixtures are engineered to function as a matched system — not a patchwork of incompatible components.
Wire length matters more than most beginners realize. Understand voltage drop — the natural loss of power over distance — which can cause fixtures at the end of a long wire run to appear dimmer than those closest to the transformer. As a general rule:
The Tru-Scapes® 250′ 12/2 EZ Pull Wire is engineered for outdoor deck applications, with UV-resistant insulation and a direct-burial rating. The EZ Pull carton design also prevents tangling during installation — a small detail that saves real time in the field.
| Item | Purpose | Required? |
|---|---|---|
| Low voltage transformer | Powers the entire system | Yes |
| 12/2 landscape wire | Carries power to fixtures | Yes |
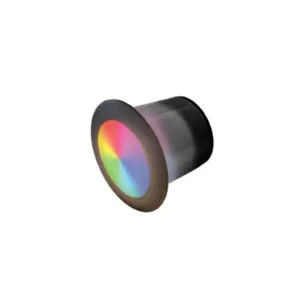
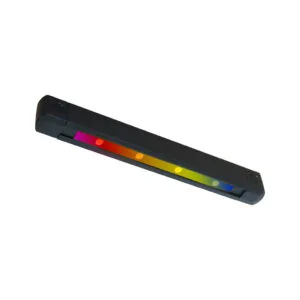
| LED deck step riser lights | Illuminates stair risers | If stairs present |
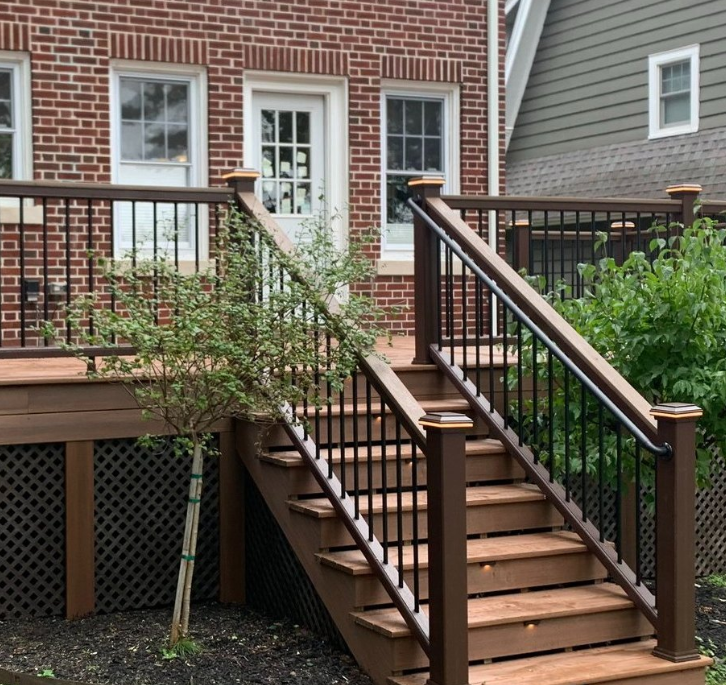
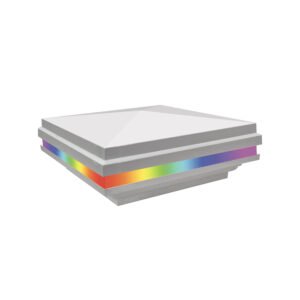
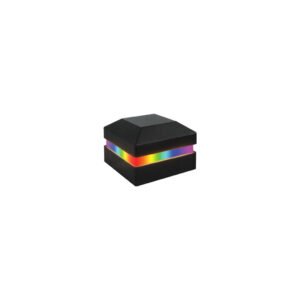
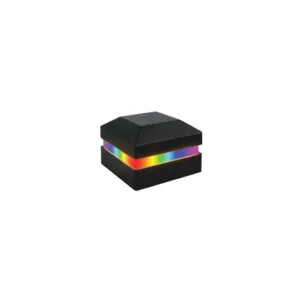
| Post cap lights | Tops deck posts | If posts present |
| Gel-filled wire nuts | Weatherproof wire connections | Yes |
| Wire stripper | Prepares wire ends | Yes |
| Drill + spade bit | Routes wire through decking | Yes |
| Zip ties / staples | Secures wire runs | Yes |
| Voltage tester | Confirms safe connections | Strongly recommended |
This numbered sequence covers a typical residential deck installation with step lights and post fixtures.
Mount your transformer on an exterior wall within reach of a GFCI-protected outlet. The unit should be at least 12 inches off the ground to prevent water intrusion. Tru-Scapes engineers their 100W Transformer with a weather-resistant housing built for this kind of year-round exposure.
Walk your deck with tape or chalk and mark every fixture location. For step lights, center each fixture on the riser face — not the tread — so the light throws downward onto the step below. For post caps, confirm your post diameter matches the fixture’s base before purchasing.
Starting at the transformer, run your Tru-Scapes 12/2 EZ Pull Wire along the path to your first fixture. Keep wire runs along the underside of decking boards where possible, securing with staples or zip ties every 18–24 inches. Drill through framing members with a spade bit when you need to change directions.
Leave 8–10 inches of extra wire at each fixture location — this gives you slack to work with when making connections.
The 3-inch LED Step Riser Light installs directly into the face of a stair riser using a standard hole saw or spade bit. Feed the fixture’s lead wires through the hole, seat the housing flush, and secure with the provided hardware. Pull the lead wires out to where they’ll meet your main wire run.
Repeat this process for every step before making any wire connections — it’s far easier to run all fixtures first, then connect them in sequence.
This is where most beginners make mistakes. Strip 3/4 inch of insulation from each wire end, match polarity (most low voltage wire is color-coded or has a ridge on one conductor), and twist the wires together firmly. Then cap each connection with a gel-filled wire nut.
Gel-filled wire nuts are non-negotiable for outdoor deck lighting. Standard wire nuts allow moisture to wick into connections over time, causing corrosion and intermittent failures — especially in climates with hard winters. The gel compound inside Tru-Scapes’ wire nuts displaces moisture and creates a permanent weatherproof seal around the connection.
With all fixtures connected, run the main wire back to your transformer and connect to the output terminals. Set your timer or photocell settings, plug in the transformer, and test the system before buttoning up any concealed wire runs.
If fixtures at the far end of a run appear dim, check for loose connections first. If connections are solid, you may be experiencing voltage drop — try shortening the run or switching to a heavier gauge wire on that circuit.
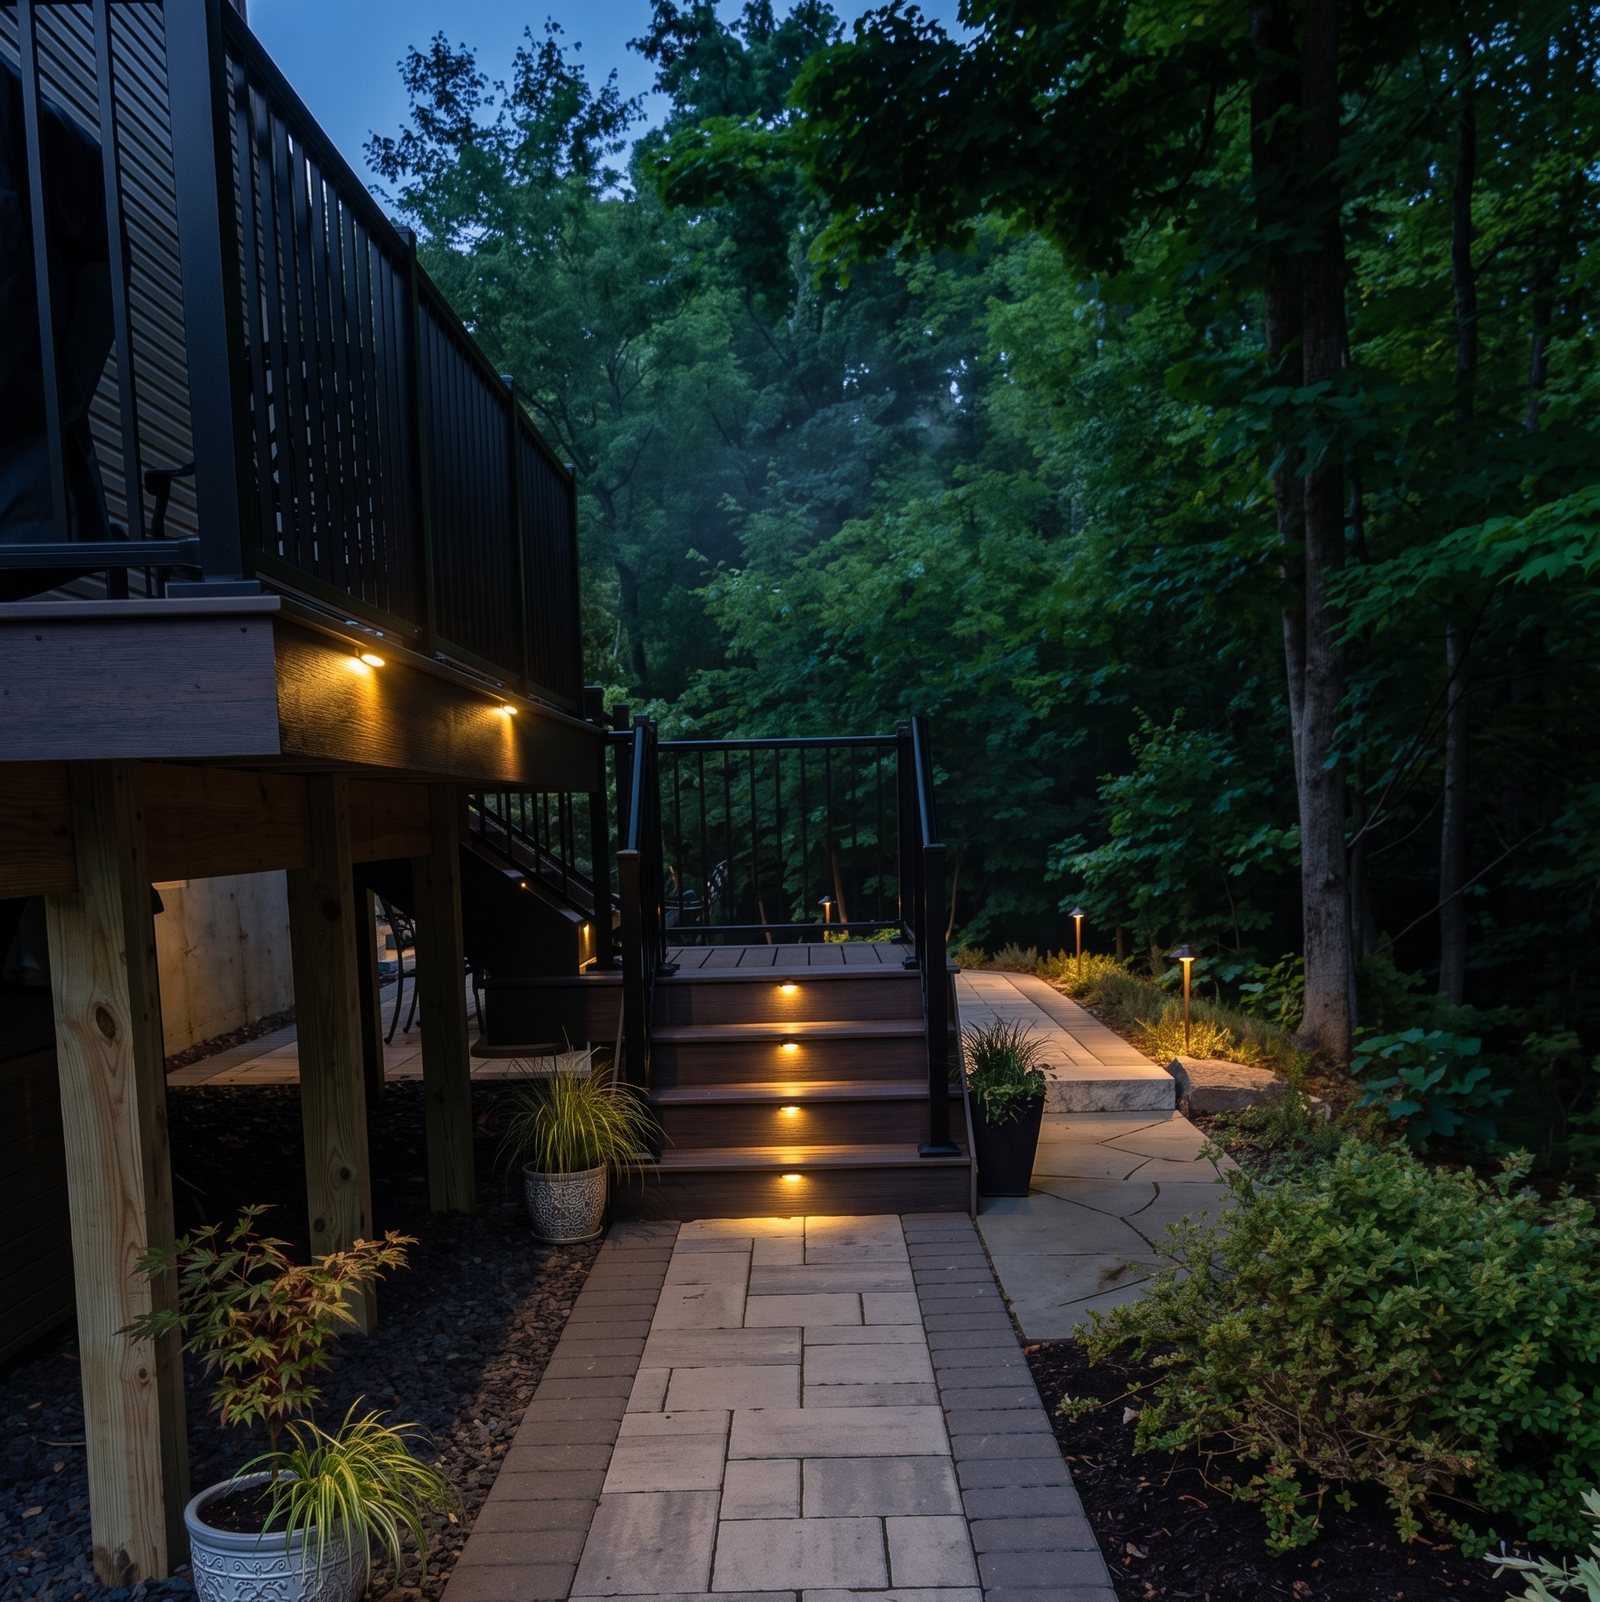
Once the system passes your test, secure all exposed wire runs neatly and conceal them where the deck design allows. Use low-profile wire staples along the underside of decking boards, and consider black conduit for any runs that are visible.
| Pros | Cons |
|---|---|
| No permit required in most jurisdictions | Mistakes require troubleshooting patience |
| Safe to handle at 12 volts | Voltage drop calculations require planning |
| Expandable system over time | Poor-quality components fail quickly outdoors |
| Professional-looking results achievable | Wire concealment can be labor-intensive |
| Works with photocell and timer automation |
| Do | Don’t |
|---|---|
| Use gel-filled wire nuts on every outdoor connection | Use standard indoor wire nuts outside |
| Leave 20–25% wattage headroom in your transformer | Max out transformer capacity at 100% load |
| Plan your wire runs before cutting any wire | Wing your layout and cut wire short |
| Use 12/2 wire for runs over 50 feet | Use undersized wire on long runs |
| Mount transformer near a GFCI outlet | Plug into a non-GFCI standard outlet outdoors |
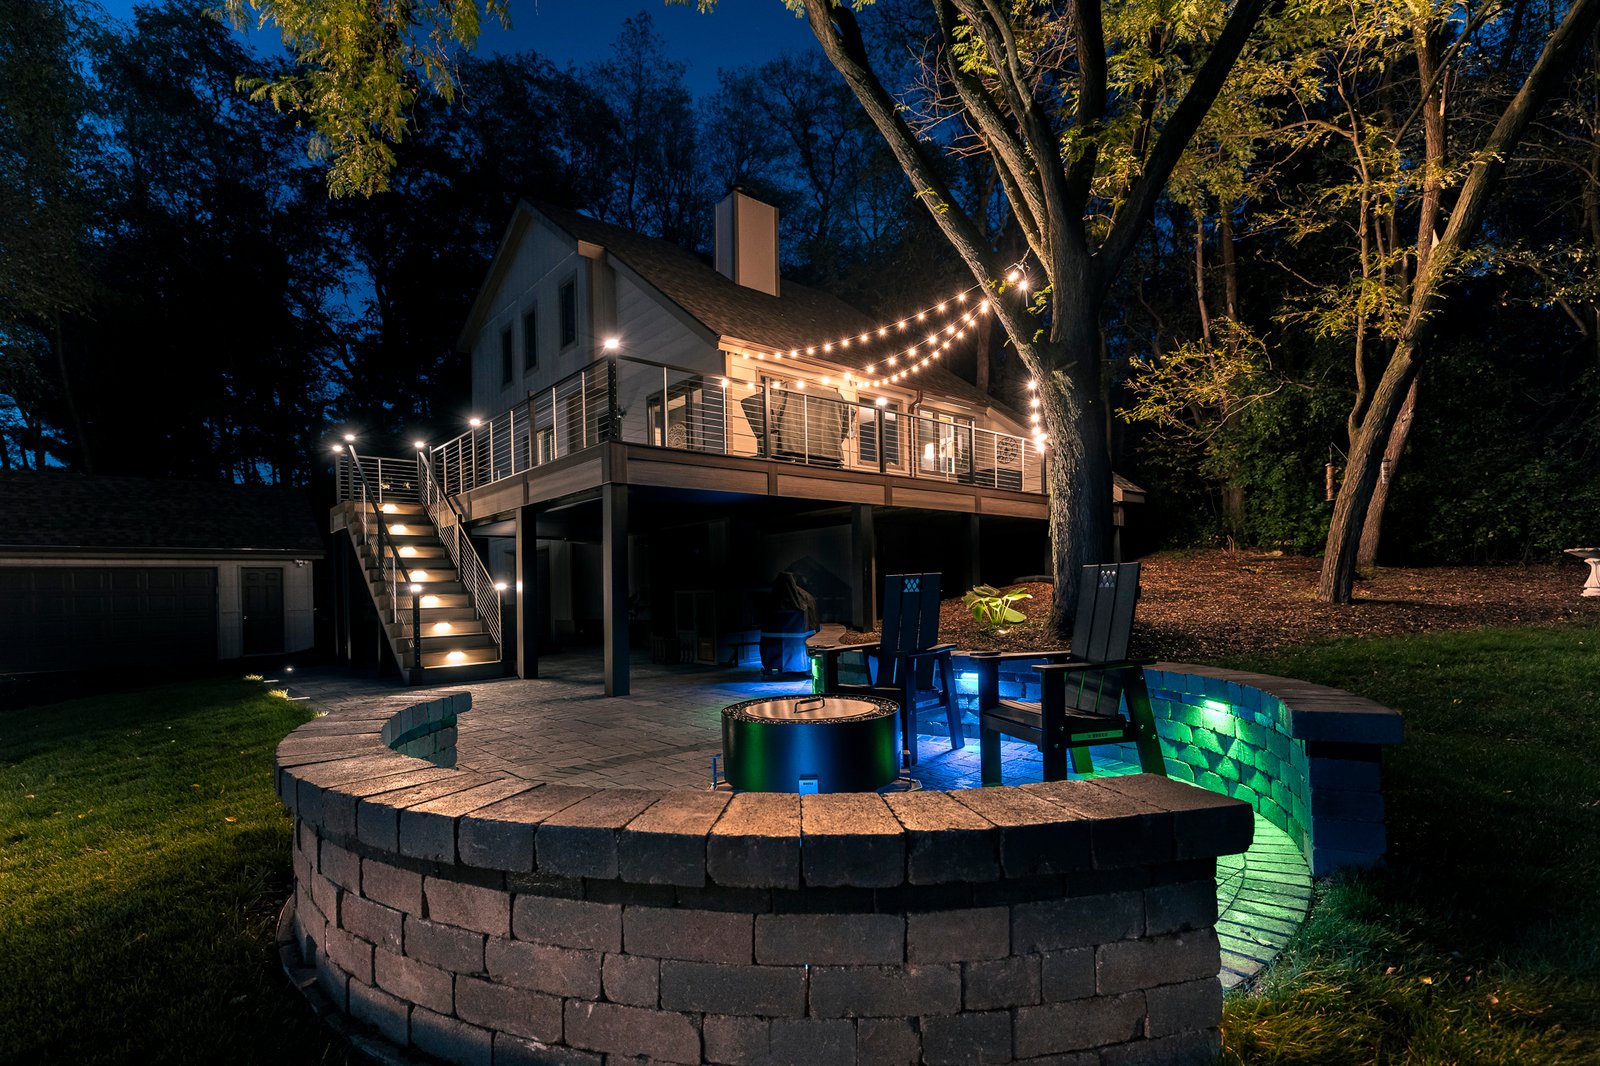
Consider a homeowner with a two-story deck built on an older home. The deck has 12 risers from grade to the upper level, six 4×4 posts along the perimeter, and no existing outdoor lighting. After planning the layout, they determine they need 12 step riser lights and 6 post cap lights — a total system load under 80 watts.
They mount a Tru-Scapes® 100W Transformer near the back door, set the built-in photocell to activate at dusk, and run a single 100-foot loop of Tru-Scapes® 250′ 12/2 EZ Pull Wire under the decking boards. Each Tru-Scapes® 3″ LED Deck Step Riser Light is tapped into the main run with gel-filled wire nuts and seated flush in each riser face.
Total installation time: one weekend. Result: a fully illuminated deck with stair lighting that activates automatically at dusk — no electrician, no permit, no mystery.

The 100W Transformer is the control center for your entire low voltage deck lighting system. It steps household current down to a safe 12 volts AC, includes built-in timer and photocell functionality, and is housed in a weather-resistant enclosure designed for permanent outdoor mounting. Tru-Scapes engineers their transformer to work as a matched unit with their fixture line, so you’re not guessing at compatibility.

This 250-foot carton of 12/2 wire is built for outdoor deck and landscape applications where UV exposure, moisture, and temperature swings are facts of life. The heavier 12-gauge conductors handle longer runs without the voltage drop that plagues thinner wire, and the EZ Pull carton format lets you unspool cleanly without tangles or kinks mid-installation.

This compact riser light is purpose-built for deck stair installations, fitting cleanly into a standard 3-inch hole and sitting flush with the riser face. The LED output is engineered to throw light downward onto the tread below — exactly where you need it for safe footing — rather than producing glare at eye level. Built to handle year-round outdoor exposure with a durable housing that won’t degrade in UV or rain.

Every wire connection in an outdoor deck lighting system is a potential failure point — unless it’s sealed against moisture. These gel-filled wire nuts encase the connection in a moisture-displacing compound that prevents corrosion and shorts from freeze-thaw cycling, rain intrusion, and humidity. A 50-piece pack covers a full deck installation with extras on hand for future expansions.
Most homeowners attempting outdoor deck lighting for the first time encounter the same frustration: they assemble components from different manufacturers, and the system underperforms because nothing was designed to work together. A transformer sized for one fixture type struggles with another. Wire rated for buried landscape runs behaves differently on an above-grade deck. Connections that seem solid indoors fail after one hard winter.
Tru-Scapes solves this by engineering their products as a system — not a collection of standalone parts. The Tru-Scapes® 100W Transformer is sized and spec’d for the fixture wattages Tru-Scapes produces. The 12/2 EZ Pull Wire handles the voltage and distance demands of residential deck runs. The 3″ LED Step Riser Light is designed to seat cleanly and perform consistently over years of outdoor exposure. And the gel-filled wire nuts address the single most common point of failure in any outdoor low voltage installation: the connection itself.
When you choose Tru-Scapes, you’re not troubleshooting compatibility issues or wondering why your far fixtures are dim. You’re working with a purpose-built system that reflects real-world installation experience — so your first deck lighting project looks and performs like it was done by a professional.
A: In most U.S. jurisdictions, low voltage (12V) outdoor lighting does not require a licensed electrician or a building permit. However, the transformer itself plugs into a standard 120V outlet, which must be GFCI-protected and up to local code — if that outlet doesn’t exist yet, an electrician would be needed to install it.
A: That depends on the wattage of each fixture. If your fixtures are 3 watts each, a 100W transformer can handle approximately 26–33 fixtures while staying within the recommended 80% load threshold. Always calculate your total fixture load before purchasing a transformer.
A: For most residential deck lighting runs under 100 feet, 12/2 wire is the right choice. The Tru-Scapes® 12/2 EZ Pull Wire is specifically designed for this application, offering heavy-gauge conductors and UV-resistant outdoor insulation that holds up to deck conditions year-round.
A: Dimmer fixtures at the end of a wire run are the classic sign of voltage drop. Solutions include shortening the run, using heavier gauge wire, splitting the run into two shorter circuits off the transformer, or moving to a “T” layout rather than a daisy-chain.
A: Yes — they’re one of the most important components in any outdoor low voltage installation. Standard wire nuts allow moisture to enter connections over time, leading to corrosion, intermittent failures, and eventually dead fixtures. Tru-Scapes® Gel-Filled Wire Nuts seal each connection against moisture intrusion and are rated for direct burial and outdoor exposure.
A: Yes. Most composite decking brands can be drilled with a standard spade or hole saw bit. Check your deck manufacturer’s guidelines for recommended hole sizes and any warranty considerations before drilling.
A: The terms are often used interchangeably, but technically a riser light mounts in the vertical face of a stair riser, while a step light can refer to any fixture that illuminates a step — including surface-mounted options on treads or rails. The Tru-Scapes® 3″ LED Deck Step Riser Light is a riser-mount design, meaning it installs in the vertical riser face and casts light downward onto the tread below.
A: Secure wire runs with appropriate outdoor staples or wire clips every 18–24 inches along framing members. For wire that crosses open spans or passes through high-traffic areas, run it through flexible conduit. The UV-resistant insulation on Tru-Scapes® 12/2 wire adds a layer of protection for exposed sections.

Low voltage deck lighting installation is one of the most accessible outdoor electrical projects a homeowner can take on — and one of the most rewarding. A deck that goes dark at sunset is a deck that only earns half its value. With the right components, a clear layout plan, and proper connections, you can build a system that performs reliably for years with minimal maintenance.
The difference between a system that shines and one that frustrates usually comes down to component quality and compatibility. Start with a matched system built around the Tru-Scapes® 100W Transformer, run it with properly rated wire, protect every connection with gel-filled wire nuts, and install fixtures engineered specifically for deck environments. That’s not complexity — that’s a plan that works.
Your deck deserves to be used after dark. The right lighting system makes that possible.
Getting deck lighting transformer sizing right is one of those decisions that sets the tone for your entire outdoor lighting

When the sun goes down, a well-lit deck becomes the centerpiece of your backyard. But achieving that effect requires more